Wednesday, August 26, 2020

Gilded Autumn Suite, Banner Year Bundle and Festive Corners


Hi all!  I hope you are all having a great week and I pray that you are all safe and healthy during these times.  As promised here are the directions for the projects I demonstrated in my Facebook Live on Sunday, August 23rd.  Enjoy!


Grateful for You Card


Supplies:


Stamps: Beautiful Autumn

Inks: Versamark, Cajun Craze

Cardstock: Cajun Craze – two pieces; one cut 8/12” x 5 1/2 and scored at 4 ¼: and one cut to 2 ½’ x 2 ½” square.

Brushed Metallic – the lighter Gold of the three in the pack, two pieces:  one cut to 3 ½” x 3 ½” and one cut to 1 ¼” x 2 ½”. 

Gilded Autumn Designer Series paper – two pieces; one cut to 3” x 3” and one cut 1 ¾” x 4” (see photo for which design was used)

Early Espresso – one piece cut to 1” x 2 ½”

Very Vanilla – one piece cut to 4” x 5 ¼” for inside of card

Accessories: Gold embossing powder, Banner Triple Punch, Basket Weave & Metallic Ribbon combo pack, Acorn Trinkets, Linen thread, Heat embossing tool, Mini Stampin’ Dimensionals.


Directions:


Adhere the 3” x 3” piece of Designer Series Paper to the 3 ½” x 3 ½” piece of Brushed Metallic Gold cardstock.  Adhere the Cajun Craze 2 1/2 “x 2 ½” square to the center of the Designer Series Paper. Use the Triple Banner punch to create a banner end on the 1 ¾” x 4” piece of Designer Series Paper.  The piece will not fit into one of the channels of the punch so turn the punch over to be sure your paper is centered in the punch.  Use scotch tape to mask off the “My Heart” and “is” words on the stamp.  Ink the stamp with Versamark and then remove the scotch tape.  Stamp onto the 1” x 2 1/2'” piece of Early Espresso.  You will see that the only thing that inked is the “grateful for you” wording on the stamp.  Heat emboss using Gold embossing powder.  Cut a slanted edge on the embossed piece (use the photo for placement). Adhere the embossed piece to the 1 ¼” x 2 ½” piece of Gold Brushed Metallic cardstock and trim it to match.

Cut a 6” piece of the Mint Macaroon ribbon from the Basked Weave & Metallic Ribbon combo pack.  Wrap this around the banner punched piece of designer series paper.  Cut about 15” of the Metallic ribbon from the combo pack, wrap it around the banner piece and tie a bow on the right hand side.  Use Mini Dimensionals to mound the Grateful for you piece to the left side of the banner and adhere to the layered square.  Adhere the square to the front left side of the card.  Use Cajun Craze ink to stamp an acorn on the bottom left of the card.  Use the Cajun Craze ink to stamp a few random Acorn images on the Very Vanilla piece and then adhere that to the inside of the card.


Thank You Card


Stamps: Beautiful Autumn

Inks: Memento Tuxedo Black, Mint Macaron, Cajun Craze, Early Espresso, Crumb Cake

Cardstock: Early Espresso – one piece cut 8 ½” x 5 ½” and scored at 4 ¼”.

Very Vanilla –three pieces; one cut to 1” x 2 ¾” and one cut to 4” x 5 ¼” (for inside of card) and a large scrap to stamp and punch images.

Designer Series Paper – Two pieces; one piece cut to 4” x 5 ¼” (see photo for which design was used) and one piece cut to ½” x 4” (for inside of card)

Accessories: Autumn Punch Pack


Cut 1” from the left side of the Designer Series Paper and “flip” it over so the back side of the Designer Series paper is showing.  Adhere both pieces to the card base.  Stamp the sentiment toward the right edge of the 1” x 2 ¾” piece of Very Vanilla cardstock and adhere it to the lower right side of the card front (use photo for placement).  One the large scrap of Very Vanilla cardstock stamp the five each of the outline images for the Acorn, Maple Leaf and Oak Leaf.  Use Mint Macaron to stamp the “filler” stamp on each of the Oak Leaf images, Cajun Craze to stamp the “filler” image of the Maple Leaf, Early Espresso to stamp the “filler” image for the acorn cap and Crumb Cake to stamp the “filler” for the acorn itself.  Punch out the images and place along the seam of the two pieces of Designer Series Paper (See photo for placement).  Adhere the ½” x 4” piece of Designer Series Paper to the 4” x 5 ¼” piece of Very Vanilla and adhere to the inside of the card.


Happy Fall Y’all Card


Stamps: Banner Year

Inks: Memento Tuxedo Black

Cardstock: Early Espresso – three pieces; one cut 8 ½” x 5 ½” and scored at 4 ¼” , one cut to ¾” x 4” and one piece cut ½” x 5 ¼”

Gilded Autumn Designer Series Paper (see photo for pattern) – three pieces; one cut to 4” x 5 ¼”, one cut to ½” x 2 ¾” and one cut to ¾” x 4” (for inside of card)

Very Vanilla – one piece cut to 4” x 5 ¼” (for inside of card)

Accessories: Banners Pick a Punch


Cut 1” from the left side of the 4” x 5 ¼” piece of Designer Series Paper and “flip” the back side to the front and adhere these pieces to the card front.  Use the ½” x 5 ¼” piece of Early Espresso to cover the seam.  Use Memento ink to stamp the Jack O’Lantern face onto the all of the larger pumpkin images on the Designer Series Paper.  Use the Crumb Cake side of the ½” x 2 ¾” piece of Designer Series Paper and punch on the right hand side using the Banners Pick a Punch.  Stamp the sentiment onto the punched piece of Designers Series Paper.  Use the Banners Pick a Punch to punch the right side of the ¾” x 4” piece of Early Espresso cardstock.  Adhere the stamped Crumb Cake piece of Designer Series Paper to the punched Early Espresso piece leaving an even border at the top, bottom and right sides.  Trim the left sides even.  Adhere this piece to the lower right side of the card front (use the photo for placement)


“Spooky” Card


Stamps: Festive Corners

Inks: Memento Tuxedo Black, Pumpkin Pie, Smoky Slate, Basic Gray

Cardstock: Basic Black – Three pieces; one cut to 4 ¼” x 5 ½”, one cut to 2 ½” x 11” and scored at 5 ½” and one cut to 1 1/8” x 3”

Whisper White – three pieces; one cut to 3” x 5 ¼”, one cut to 2 ¼” x 5 ¼” and one cut to 1” x 2 7/8”

Plaid Tidings Designer Series Paper (Refer to photo for pattern used) – four pieces; one cut to 2 ¼” x 5 ¼”, one cut to ¾” x 2 ¼” and two pieces cut 1” x 5 ¼”

Accessories: Rhinestones, Dark Basic Black Blends, Black Stampin’ Dimensionals and Stampin’ Sponges.


Directions:

Adhere the two 1” pieces of Designer Series Paper to opposite sides of the 4 ¼” x 5 ½” card base.  Set aside.  Use Memento Ink to stamp the Cobweb corner image in the right top corner of the 3” x 5 ¼” piece of Whisper White Cardstock.  Adhere the 1 1/8” x 3” piece of Basic Black cardstock onto the cobweb image, lining up the right side of the cardstock with the line of the cobweb image.  Turn the cobweb stamp upside down and stamp with Memento ink lining it up with the bottom left side of the Basic Black cardstock.  “Fussy cut” around the cobweb image.  Sponge the cobweb image with Smoky Slate ink and then sponge around the edges of the cobweb image with Basic Gray ink.  Stamp the “Spooky” sentiment onto the ¾” x 2 7/8” piece of Whisper White.  Sponge around the edges of this piece using Pumpkin Pie ink.  Adhere this piece to the Basic Black piece on the cobweb image.  Adhere the 2 ¼” x 5 ¼” piece of Designer Series Paper to the front of the folded 2 ½” x 11” piece of Basic Black.  Use Black Stampin’ Dimensionals to adhere the cobweb image to this piece.  Use the Dark Basic Black Blends to color six of the rhinestones.  Place one rhinestone on the inside corner of each cobweb and then place two rhinestones at the top left and two at the bottom right (use photo for placement).  Use Memento Ink to stamp the “Trick or Treat, Happy Halloween” image in the top right hand corner of the 2 ¼” x 5 ¼” piece of Whisper White.  Use the Memento ink to stamp the spider image directly below the “e” in Treat. 

Adhere the ¾” x 2 ¼” piece of Designer Series Paper to this and adhere this piece to the inside of the folded 2 ½” x 11” piece of Basic Black.  Adhere the folded piece in the center of the card base.

Have a great week!   See you Sunday, August 30th at 2pm for another Facebook Live!

Wednesday, August 19, 2020

Harvest Hellos and Celebration Tidings

 Hi all!  Hope you are having a great week.  These are the directions for the projects seen on my Facebook Live from August 16, 2020


Apple Teacher Treat


Stamps:  Harvest Hellos

Inks: Memento Tuxedo Black, Versamark

Cardstock: Real Red scrap for apple images, Basic Black 4 ¼” x 2” and a scrap for stamping the sentiment.  Garden Green and Crumb Cake scraps

Stampin’ Blends:  Dark Soft Suede

Accessories:  White ink pen (non-SU), Apple Builder Punch, Glue dots, White Embossing Powder, Heat tool, Black Stampin’ Dimensionals.  Black Glittered organdy ribbon


Directions:

Stamp two of the apple outlines using Memento Tuxedo Black onto Real Red cardstock.  Use White ink pen to accent the lines on the apple image (see photo for placement).  Punch the apples out using the Apple Builder Punch. Stamp two apple stems using Memento Tuxedo Black onto Crumb Cake cardstock and color with the Dark Soft Suede Stampin’ Blends.  Stamp two leaf images onto Garden Green cardstock using Memento Tuxedo Black.  Punch all out using the Apple Builder punch.  Attach a stem and a leaf to each apple using glue dots.  Score the 4 ¼” x 2” piece of Basic Black along the long sides at 1 3/8” and along the short sides at 1 ½” from each end.  Place Tear and Tape along each long side as close as possible to the score line.  Cut on each side at the 1 ½” score lines only cutting only to where the 1 3/8” score line is.  Fold up and and attach the punched apples to the folded sides.  Stamp the sentiment onto a scrap of Basic Black using Versamark ink.  Apply white embossing powder to the image and set with the heat tool.  Cut closely around the image and attach to one of the apple images using a black Stampin’ Dimensional.  Fill treat with candy wrapped in clear wrap and secured with Black glittered organdy ribbon.


Pumpkin Card


Stamps: Harvest Hellos, A Wish for Everything

Inks: Memento Tuxedo Black, Stazon Black

Cardstock: Pretty Peacock – Two pieces- one piece cut to 8 ½” x 7” and scored at 3 ½”, one piece cut to 2 ¼” x 7 ½” and one piece cut to 4 ¼” x 1 ½”

Plaid Tidings Designer Series Paper – two pieces cut 6” x 3”

Cajun Craze – two pieces – one cut to 2 ½” x 7” and one cut to 4 ¼” x 1 ½”

Very Vanilla – One piece cut to 2 ½” x 7”

Copper Foil – Three pieces - one cut to 8” x 3”, one cut to 2 ½” x 4” and one cut 4 ¼” x 1 ½”

Accessories:  Apple Builder Punch, Word Wishes dies, Hammered Metal 3D embossing folder, Adhesive Sheets, Stampin’ Dimensionals.


Directions:

Stamp three pumpkin images on the 2 ½” x 7 ½” piece of Pretty Peacock cardstock and  one pumpkin image on each of the pieces of Plaid Tidings Designer Series paper using Memento Tuxedo Black Ink.  Use the Apple Punch to punch stems from one of the pieces of the Plaid Tidings Designer Series Paper. Clean the stamp and then stamp the pumpkin image one more time onto the 2 ½” x 4” piece of Copper Foil cardstock using Black Stazon Ink.  The ink will be a little slippery on the foil cardstock so be sure not to rock or move the stamp once it makes contact with the cardstock.  Use the Apple Builder punch to punch out all of the pumpkins.  Leave the three Pretty Peacock pumpkins whole and cut the other three pumpkins into sections.  Adhere the pumpkin sections in a random pattern to the Pretty Peacock pumpkins.  Emboss all three pumpkins using the Hammered Metal 3D embossing folder.  Use this same folder to emboss the 8” x 3” piece of Copper Foil cardstock (the cardstock will be longer than the embossing folder so run it through once and then turn the cardstock run it through again.  Apply a piece of adhesive sheet to the back of the 4 ¼” x 1 ½” piece of Copper Foil cardstock and then cut the “Thanksgiving” die from the Word Wishes die using the Stampin’ Emboss an Cutting machine. Remove the remaining backing from the adhesive sheet on the “Thanksgiving” die cut and adhere the die cut to the 4 ¼” x 1 ½” piece of Cajun Craze cardstock.  Trim around the die.  Stamp “Happy” from the A Wish for Everything stamp set onto a scrap of the Cajun Craze cardstock.  Hand cut around the word.  Adhere the 8” x 3” piece of embossed Copper Foil cardstock to the card base.  Adhere the 2 ½” x 7” piece of Cajun Craze cardstock to the embossed Copper Foil piece.  Be sure to use a stong adhesive or Tombow adhesive to adhere this piece as the Copper Foil is slick.  Evenly space the three pumpkins onto the Cajun Craze layer, using Stampin’ Dimensionals to adhere them.  Use Mono Adhesive to adhere the pumpkin stems and the “Happy” and “Thanksgiving” die cuts to the pumpkins. Adhere the Very Vanilla piece of cardstock to the inside of the card and decorate as desired.


Happy Haunting Treat Bag


Stamps: Celebration Tidings

Inks: Memento Tuxedo Black

Cardstock: Pumpkin Pie cut to 4 ¼” x 5 ½”

Scrap of Whisper White for the Spider

Accessories:  Celebration Label Dies, Mosaic Gusseted Cellophane Bags, Glue dots, Black Glitter Ribbon, Mini Stampin’ Dimensionals, Regular stapler


Directions:

Cut the second largest die in the Celebration Label dies from the Pumpkin Pie cardstock.  Score along the center (where the notches are) for easy folding.  Stamp the spider web swirl image towards the bottom of one end of the die cut using Memento Ink (use the photo for placement) and then stamp the Happy Haunting sentiment right above it. Fold in half to create a treat topper.  Stamp the spider image onto the scrap of Whisper White and cut out with the matching spider die.  Attach the cut out spider to the treat topper with a Mini Stampin’ Dimensional.  Cut a piect of the Black Glitter Ribbon about 7” long.  Secure one end to the back of the treat topper right below the fold.  Bring the ribbon to the front of the topper and twist it across the top of the treat topper (see photo).  Secure to the back of the treat topper using another glue dot.  I put an extra glue dot under the middle of the ribbon just to keep it twisted.  Put desired treats into a Mosaic Gusseted Cellophane Bag.  Fold the top over and staple at the top.  Use glue dots to adhere the treat topper to the bag.  Happy Haunting!!


Always Grateful Card


Directions:


Stamps: Celebration Tidings

Inks: Memento Tuxedo Black, Pumpkin Pie

Stampin’ Blends:  Light and Dark Pumpkin Pie, Light and Dark Old Olive, Dark Mango Melody, Dark Blackberry Bliss and Light Soft Suede

Cardstock: Pumpkin Pie - two pieces; one cut to 4 ¼” x 5 ½” and one cut to  8 ½” x 3”1/2” and scored at 4 ¼”.

Very Vanilla - Two pieces cut to 3 ¼” x 4”

Plaid Tidings Designer Series Paper (DSP) – (see photo for pattern used) four pieces; two cut to 1” x 4”, one cut to  3 ¼” x 1 ½”  and one cut to ½” x 3 ¼”

Accessories:  3/8” Embroidered Ribbon, Stampin’ Sponge and sticky notes to use for masking (at least 3” x 3” square), Glue Dots


Adhere the 3 ¼” x 1 ½” piece of Plaid Tidings DSP to one of the 3 ¼” x 4” pieces of Very Vanilla cardstock.  Stamp the Pumpkin image upside down close to the edge of the DSP using Memento ink.  Turn the stamp right side up and stamp toward the top of the same piece of cardstock.  Stamp the sentiment in the space between the two pumpkin images.  Place one of the 3” x 3” sticky notes along the line at the bottom of each pumpkin image and then place one on each side to form a rectangle around the sentiment.  Use the Stampin’ Sponge to apply Pumpkin Pie ink to the rectangle you have formed.  Remover the sticky notes and you should have a Pumpkin Pie shaded area over the sentiment (see photo).  Cut a 5” piece of the Embroidered Ribbon and wrap around the front of the card.  Cut another piece of the Embroidered Ribbon and tied a bow and affix this to the center of the ribbon on the front of the card using glue dots.  Fold the 8 ½ x 3 ½” piece of Pumpkin Pie cardstock along the score line.  Attach the stamped image to the front of this piece.  Adhere the ½” x 3 ¼” piece of DSP along the bottom of the remaining Very Vanilla cardstock and adhere this to the inside of the folded cardstock.  Place the 1” x 4” pieces of DSP on either side of the 4 1’4” x 5 ½” piece of Pumpkin Pie cardstock leaving an even border around the outside edges.  Adhere the folded piece of Pumpkin Pie cardstock containing the image on the front to the middle of the 4 ¼” x 5 ½” piece of cardstock.  Enjoy!

Here's the link to the Facebook Live video if you want visual instructions as well:

https://www.facebook.com/StampinwithRuthieB/videos/679469599593023

Have a great week!

Sunday, August 2, 2020

Blossoms in Bloom Bundle

Hey all!  This week I am featuring the Blossoms in Bloom Bundle!  This is such a versatile bundle and I know you are all going to love it!!!    First, I wanted to share a little personal news just so you guys know what's been going on with me.  On June 23rd, my husband, Ralph, was diagnosed with Colon Cancer.  He had surgery on July 14th to remove the tumor and yesterday we found out that they were able to successfully remove all of the cancer and he will not require Chemo.  It has been a long month but we are so thankful that Ralph had such a good outcome!

Now, back to Stamping!  I shared three projects on my Facebook Live (originally aired on Sunday, July 28th but I had to re-record it, so it was posted yesterday).  The first project was inspired by Jennifer McGuire and the other two were inspired by Stampin' Up!  So without further ado, here they are!

CARD 1


Supplies: 

Stamps:  Blossoms In Bloom

Cardstock:  Misty Moonlight – four pieces – two cut to 8 ½” x 5 ½” (cardbases) and scored at 4 ¼”, two cut to ¾” x 4”; Whisper White – five pieces – one cut to 8” x 4 ¼”, two cut to 4” x 5 ¼” and two cut to ½” x 4”

Ink:  Misty Moonlight, Calypso Coral, Bumblebee, Cinnamon Cider, So Saffron, Just Jade

Accessories:  Lovely Labels Pick a Punch, Clear and Frosted Epoxy Droplets, Stamparatus, Stampin’ Seal adhesive


Place 8” x 4 ¼” piece of Whisper White Cardstock into the Stamparatus (left edge of cardstock will hang out of the Stamparatus and that is fine).  Place the largest image in the Blossoms in Bloom stamp set in the center of your Whisper White Cardstock so that it is in the center of the cardstock and down about 1” from the top.  The bottom of the stamp will not be on the cardstock.  Close the Stamparatus so the top plate will pick up the stamp.  Open the Stamparatus and ink the stamp with Misty Moonlight ink.  Close the Stamparatus again to stamp the image onto the cardstock.  Open the Stamparatus and remove the stamped cardstock. 


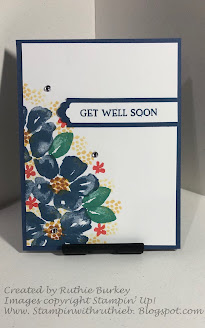
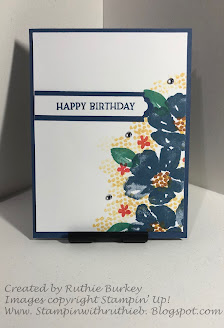
(Use the photo below for placement of the following).   Ink the flower center image with Bumblebee ink to stamp the center of the flowers.  Next use Cinnamon Cider ink to stamp the center of the flowers, offsetting from the previously stamped Bumblebee images.  Ink the smallest flower image with Calypso Coral ink and randomly stamp around the large floral image).  Ink the leaf stamp with Just Jade Ink to add a few leaves to the flowers.  Ink flower center image with So Saffron ink and stamp around the whole image.


Next cut the image into two 4” pieces.  You will now have two pieces of cardstock with mirror images.  Mount these to the Misty Moonlight card bases.  Stamp desired sentiments onto each of the ½” strips of

Whisper White Cardstock keeping in mind that one sentiment will be on the left side of the card and one on the right.  Use the Lovely Labels Pick a Punch to punch the ends of both ½” Whisper White Pieces and also to punch the ¾” Misty Moonlight pieces.  Adhere the sentiments to the the ¾” Misty Moonlight pieces and adhere one sentiment to each card.  Embellish with the Clear and Frosted Epoxy Droplets. 


Stamp any image desired to accent the two 4” x 5 ¼” pieces of Whisper White Cardstock and adhere to the inside off each card.  Voila!  Two cards done!


Card 2


Stamps:  Blossoms in Bloom

Cardstock:   Old Olive cut to 8 ½” x 5 ½” and scored at 4 ¼” (cardbase), Whisper White cut to 4” x 5 ¼” for inside of card, Calypso Coral cut to 4 ¼” x 5 ½” and Petal Pink – two pieces; one cut to 4 ¼” x 5 ½” and one cut to ½” x 4 ¼”.

Inks:  Old Olive, Calypso Coral

Accessories:  Many Layered Blossoms Cut and Emboss dies, Adhesive sheet cut to 4 ¼” x 5 ½”, Mono Adhesive and Stampin’ Dimensionals, Banners Pick a Punch


Ink the flower center image with Old Olive and stamp randomly around the outside edges of the card front covering about 1 ½” from all edges of the card front.  Adhere the Adhesive sheet to the Calypso Coral cardstock and use the thinner flower cluster of the two large floral dies from the Many Layered Blossoms dies.  Use the thicker floral floral cluster of the two large floral dies from the large Petal Pink piece of cardstock.  Remove the backing from the adhesive on the back of the Calypso Coral diecut and adhere it to the Petal Pink diecut.  Adhere all to the card front.  Stamp the sentiment using Calypso Coral ink onto the ½” x 4 ¼” piece of Petal Pink Cardstock.  Create banner ends on the stamped sentiment using the Banners Pick a Punch.  Adhere to the card front using Stampin’ Dimensional.


Card 3


Stamps:  Blossoms In Bloom

Cardstock:  Just Jade – two pieces; one cut to 8 ½” x 5 ½” and scored at 4 ¼” and one cut to ¾” x 2 ¾”.  Whisper White – Two pieces cut to 4” x 5 ¼”, one for the card front and one for the inside of the card. 

One scrap of whisper white to die cut the small flowers and onescrap of Calypso Coral to die cut the small flowers.

Ink: Calypso Coral, Bumblebee, Just Jade

Accessories:  Many Layered Blossoms Cut and Emboss dies, Adhesive sheet cut to 2” x 5 ½”, Mono Adhesive, Clear and Frosted Epoxy Droplets and Stampin’ Dimensionals.


Ink the largest floral with Bumblebee ink and stamp onto one of the 4” x 5 ¼” pieces of Whisper White Cardstock.  Stamp the flower center image using Calypso Coral.  Stamp the leaves where desired using Just Jade ink.  Adhere the finished image to the card front.


Apply Adhesive sheet piece to the Calypso Coral scrap and cut three of the thinner small flower images using the Many Layered Blossoms dies.  Cut three of the thicker flower images from the scrap of Whisper White.  (NOTE:  There are two sizes of the small flowers, make sure you match the dies when cutting).  Adhere the Calypso Coral die cuts to the Whisper White die cuts.  Stamp the sentiment using Just Jade ink onto the ¾” x 2 ¾” piece of Just Jade Cardstock.  Adhere the die cuts and the sentiment to the card front using the photo for placement.


Here is the link to the video:

Blossoms in Bloom Facebook Live

Have a wonderful week!!!!!!

Listed below are the products I used for these projects: