
The
following cards were featured on my Facebook Live on August 22, 2021 and
feature the Reflected in Nature stamp set on page 60 of the July-December Mini
Catalog
Inspiration Board Card

1.
Adhere
the 4” x 5 ¼” piece of Cork Specialty Paper to the front of the card base.
2.
Use
the Stamparatus and Cinnamon Cider ink to
stamp the cabin image onto the 3 ½” x 4” piece of Very Vanilla Cardstock (you may need to stamp twice to get the
desired depth of color) Fussy cut around
the image.
3.
Place
the stamped image into the Timeworn Type 3D Embossing folder and use the
Stampin’, Cut and Emboss machine to emboss the image.
4.
Use
scissors, a bone folder or your fingernail to rough up the edges of the image
and then adhere the image to the card front, leaving room for the sentiment on
the upper right side of the card front. Place a copper Brushed Metallic
Adhesive-Backed Dot in the top center of the image as if it were holding the
image to the cork board.
5.
Use
Early Espresso ink to stamp the sentiment onto the scarp of Crumb Cake
cardstock. Use scissors to cut around
the sentiment and then cut the sentiment into two pieces. Adhere the two pieces onto the upper right side
of the card front.
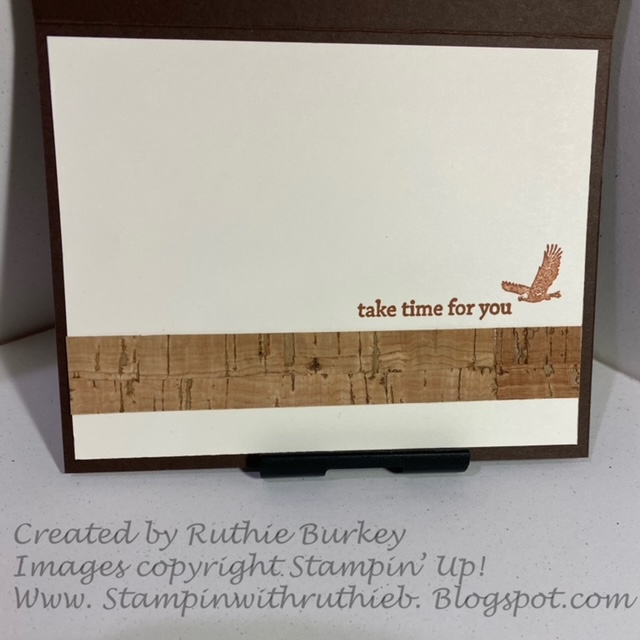
6.
Adhere
the ¾” x 5 ¼” piece of Cork cardstock to the bottom of the 4” x 5 ¼” piece of
Very Vanilla cardstock. Use Cinnamon
Cider ink to stamp the sentiment directly above the strip of Cork. Use the Cinnamon Cider to stamp the small
eagle image to the right of the sentiment stamping off once to make the eagle a
little lighter than the sentiment.
Adhere this whole piece to the inside of the card.
7. Send this to someone needing encouragement.
Adventure Card


Smoky Slate – one piece cut to ½” x 4”
Peaceful Place (DSP): two pieces – one piece cut to 4” x 5 ¼” and one piece cut to ½” x 4” (See photo for pattern used)
Directions:
1. Adhere the 4” x 5 1/4”
piece of DSP to the front of the card.
2. Use the Stamparatus and Basic Gray ink to stamp the cabin image
onto the 3 ½” x 4” piece of Basic White cardstock (you may need to stamp twice
to get the desired depth of color) Fussy
cut around the image
3. Use the Blending Brush
to apply Balmy Blue ink to the bottom half of the image. Use Wink of Stella to highlight the snow and
the ripples in the reflection and then adhere this piece to the card front
centering at the top of the card (see photo for placement)
4. Use Basic Gray ink to
stamp the sentiment onto the ½” x 4” piece of Smoky Slate cardstock. Use the Banners Pick a Punch on each end of
this piece. Adhere this piece to the ¾”
x 4” piece of Basic Gray cardstock and then adhere the whole piece to the
bottom of the card (see photo for placement)
Place a silver Metallic Pearl on each side of the banner ends of the
sentiment.
5. Use Basic Gray ink to
stamp the sentiment onto the 4” x 5 ¼” piece of Basic White cardstock. Adhere the ½” x 4” piece of DSP to the bottom
of this piece and then adhere the whole piece to the inside of the card.
6. Send this card to someone who is starting a new journey!
If you are having problems visualizing these directions, remember you can see them created step-by-step on my Facebook Live from August 22nd HERE. Enjoy these projects and please share them with a special friend!
Remember,
if you would like to purchase any of the supplies to make these cards, just
click the “Shop Now” button above to be taken to my Online Store and don’t
forget it’s Sale-a-Bration time for every $50 purchase earns FREE product!!!! Be sure to use the Host Code (also listed
above) if your order is under $150 (if your order is over $150 be sure to take
advantage of the Host Rewards offered by Stampin’ Up!)
See
you on Sunday, August 29th at 2pm for my next Facebook Live!


